
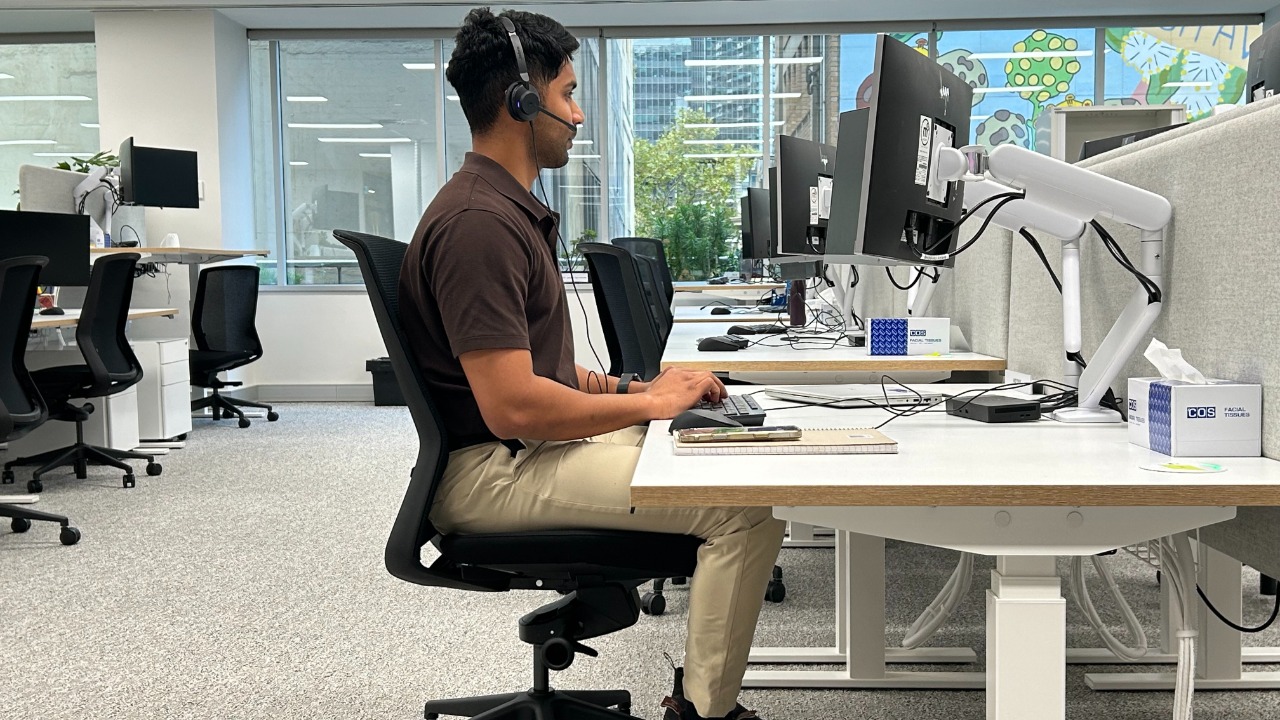
The following steps show the Aveya chair supplied at Market street. These instructions are applicable to most ergonomic chairs.
Seat height
The height adjustment lever is located under the seat pan on the front right hand side.
To raise the chair, pull the lever up and lift yourself slightly out of the seat. To lower it, stay seated, pull the lever and let your body weight bring you down.
You're aiming for your thighs to be parallel to the floor with your feet flat on the floor or resting on the footrest.
Back rest
This is a feature of the Aveya chair.
The tension control dial is on the right hand side of the seat. Rotating it clockwise increases the resistance when you lean back.
To lock the backrest, push the lever on the left hand side down. Lift the lever up towards the seat to allow the chair to move in a free float mode.
Seat slide
The lever under the seat pan extends the seat forward and back. Adjust the seat slide to support the full length of your thigh.
You should be able to bend your leg to 90 degrees comfortably and the seat pan should not press into the back of your knees.
Lumbar support
On the back of the chair you'll find two tabs, one on the left and one on the right. These move the lumbar pads up and down. Pull up or push down to position the pad so it fits in your natural curve of your lower back, roughly at waist level.
A correctly positioned lumbar support reduces the strain on your spine significantly.
Desk
When you're seated correctly in your chair with your hands on the keyboard, your elbow should be bent at roughly 90 degrees.
If they're not, adjust your chair height or if you have a sit stand desk, the desk height itself.
If you have a sit-stand desk, the same 90 degree elbow rule applies when standing, adjust the desk until your forearms are level with the surface.
Try to vary between sitting and standing throughout the day rather than staying in one position for long periods.

Keyboard
Your wrist should be off the desk surface while you're actively typing.
Resting your wrists on the desk while keying places pressure on the wrist and can cause discomfort over time.
It's fine to rest them during short pauses.
Position your keyboard about 10 centimetres from the front edge of your desk. This leaves a space for your wrists to rest during breaks.
The keyboard should be flat — do not prop it up on the kick-stand legs, as this angles the wrist upward and creates awkward posture over time.

Desk set up
Items you use constantly like your keyboard, mouse and phone should be within your primary reach zone, directly in front of you and within easy arm's reach without needing to twist or lean.
Things that you use occasionally fit in the secondary zone and rarely used items go to the outer edges.
Your mouse should sit right next to your keyboard so your upper arm stays close to your body. If you find yourself reaching outward, move the mouse in.
Computer screen
For your monitor, sit up tall, look straight ahead and check where your eyes land. They should be level with the top edge of the screen.
If you're looking down at the top of the screen, the monitor is too low. If you're looking up, it's too high.
Your monitor should be directly in front of you. You should sit about an arm's length from the monitor.
Phone calls
If you're using phone calls whilst writing or typing, use a headset or speaker phone. Do not hold a phone between your ear and shoulder while typing.

Laptop
If you use a laptop, avoid using it directly on the desk for long periods.
Connect it to a docking station with a separate keyboard, mouse and monitor. This gives you the proper screen height and keyboard position we've just covered.
If you're working away from your usual desk, try and use a hot desk where possible.
If you are working at your laptop for long periods, use a laptop riser to raise the screen to eye level and connect a separate keyboard and mouse.
This avoids the hunched posture that comes from looking down at a laptop screen.

A proper ergonomic setup reduces strain and keeps you comfortable throughout the day. Small adjustments to your workstation can make a big difference to your health and productivity.

Take a few minutes to go through the Workstation Self Assessment Checklist available on the Wire.
If you work from home, you should complete the Working from home checklist.
If you need further support, please contact wellbeing@powercor.com.au