

Personal Protective Equipment (PPE). Gloves and Safety Glasses. If you don’t already have a pair of gloves or safety glasses, please see the store person.

Tools required: Crane, two red corners, Sling (You must be signed off by the Maintenance Coordinator before using the crane, if you are not signed off ask someone who is to do it for you), angle grinder/knife.
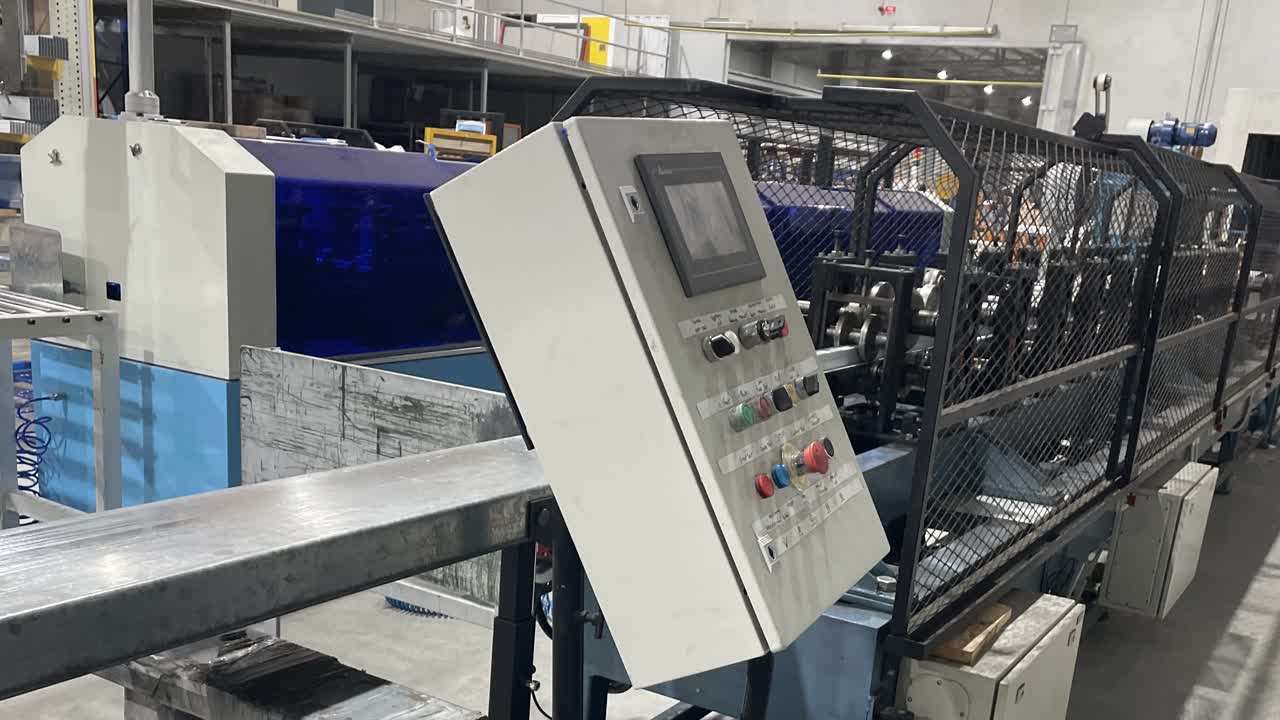
Turn the Operation Auto/Manual switch to Manual then turn the mode key to 'maintenance', you will have to do this quickly and in this order as you won’t have much time to walk from the console to the decoiler.
Press the green contract button until the de-coiler is fully contracted.

Place red corners on coil. The top corner has to go on the backside of the decoiler, make sure the tail end of the coil is facing the top hat machine and that the material uncoils from the bottom.

Add the sling and connect it to the crane, Raise the crane slightly to make sure the sling is straight.
Using the crane, slowly lift the coil out of the coil holder.
Move the coil over to the decoiler and lift it onto the mandrel, make sure it is as far back as it can go.
Press the red Expand button to expand the mandrel.
Remove the red corners and sling.

Cut the metal strap and tape with a grinder, make sure to hold the coil end, so it doesn’t hit you when unwrapped.

Using the grinder cut the end of the coil into a near triangle shape.

YOU MUST PUT ALL METAL RUBBISH IN THE BLACK TUB AT THE BASE OF THE DE-COILER.

Open the cage at the coil end of the top hat machine.
Feed the coil over the rollers and into the guide.
Reset the cage trip by pressing the black safety reset button, make sure the blue light has turned off.
Press the yellow jog button to move the coil through the machine.
Be very mindful of this section as the coil could go up and over the rollers or down and under the rollers. [See next step].

Keep a watchful eye when jogging the coil through the machine as this could happen, if this were to happen, reverse the feed, lift it up and guide it in between the rollers.
Back at the main console turn the jog switch to forward and watch the coil come through the mchine.
Advance the coil and stop it just before the guillotine.
Carefully guide the top hat through the guillotine.
Jog the top hat through then press the yellow Cut button.

Keep an eye out for any Forming irregularities (see photo for example) if this does happen, advise the Line Leader or Maintenance Coordinator.
Turn the operation switch to Auto and turn the mode switch to Normal and then press the green Start button.

Make sure to write in the comment section of your QA sheet that you have done a coil change.