
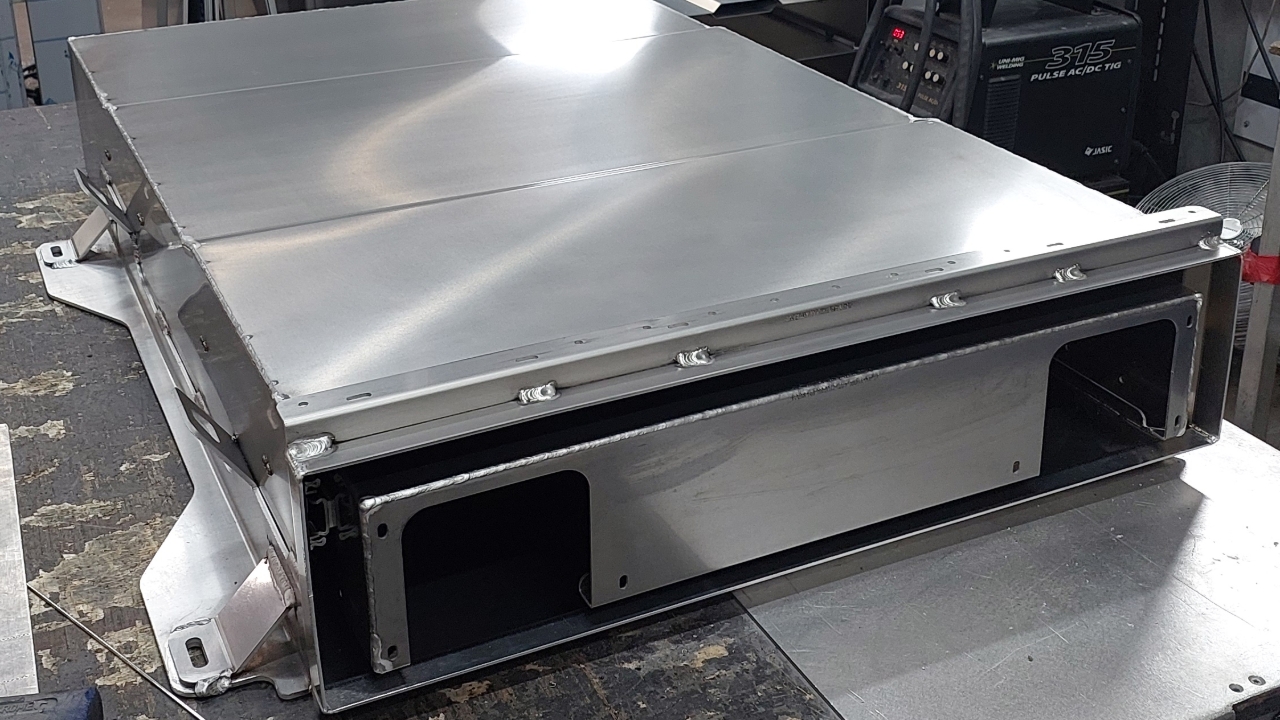

Process for preparing sheet metal parts for welding.
- Sand all welded edges.
- Deburr all welded edges.
- Remove protective plastic.
- Using Isopropyl Alcohol on clean rag wipe down all welded edges.

Clean work bench with Orbital Sander and rag.

Prep all parts of drawer inner ready for welding.
Using TIG torch tack weld front and rear panels to drawer body aligning panels corner to corner.

Locate stiffeners 315mm and 760mm from front of drawer.
Using MIG torch tack stiffeners at each weld indicator notch where you would finish your welds.
MIG weld stiffeners finishing each weld on tack.
Ensure you do not get any bleed through to inside of drawer.

Clean welds with rag and wire brush.
Using a steady MIG weld long edge of front and rear panels. Clean edge with rag and wire brush after welding.
Minimal penetration is needed for end panel welds as it will be seen on finished product from inside of drawer.

MIG or TIG short sides of front and rear panels, If using MIG any lumps at start of welds can be flattened with TIG torch.
Clean welds with rag and wire brush.

TIG weld 4 mitre joins on top of drawer starting from inside drawer, finishing on previous welds.
Using Isopropyl clean any finger prints from drawer inner then set aside ready for assembly.

Clean work bench with Orbital Sander and rag.

Prep parts of drawer body ready for welding.
Locate stiffener in centre of panel 313mm from each edge.

Using MIG torch tack stiffener at each weld indicator notches where you would finish your welds.
MIG weld stiffener finishing each weld on tack.
Clean welds with rag and wire brush.

Prep side panels ready for welding.
Using TIG torch tack weld side panels to drawer body aligning panels corner to corner.
Rivet 1100L drawer slides from outside in.
- Drawer slides 1100mm 227kg LH Locking RH Non-locking (7707-00205)
- Use stainless steel 3/16 Orlock Rivet 3.5 - 6mm grip range (5500-00029ND).

Place drawer inner into drawer body and remove plastic from drawer slide spacer.

Starting from front of drawer rivet drawer with spacer between slides to drawer inner. Rivets to be fitted from outside in.

Prep bottom panel for welding and place on drawer body with flat bar at back of drawer as shown to support panel.
Using TIG torch tack weld base to side panels working from front of drawer back aligning panels corner to corner as you go.

Using TIG torch tack weld base to back panel aligning panels corner to corner as you go.
Using a steady MIG weld back edge of base and rear panel.
Clean edge with rag after welding.

TIG Weld first 150mm of base panel to side panels.
Using a steady MIG weld flat sections between steps in base panel. Clean edge with rag after welding.

TIG weld steps in base panel between MIG welds.

MIG or TIG weld short sides of rear panel, If using MIG any lumps at start of welds can be flattened with TIG torch.
Clean welds with rag and wire brush.

TIG Weld first 150mm of top panel to side panels.
Using a steady MIG weld long side of top and side panels. Use TIG torch to blend start of welds.
Clean edge with rag after welding.

Prep drawer mounts for welding.

Clamp mounts to drawer body as shown. Mounts located 210mm from back of drawer body.
Tack weld top and bottom at rear of mount.
Tack weld top and bottom at front of mount.

Mark and MIG weld mounts to side of drawer body as shown.
Clean welds with rag and wire brush.

On top of drawer mark measurements shown from both ends of mount. MIG weld 40mm long welds between marks.
Clean welds with rag and wire brush.
Prep mount gussets for welding. Locate 4 gussets over slots in mounts and tack weld.

MIG weld gussets as shown.
Clean welds with rag and wire brush.

Prep camera bracket for welding.
Locate camera mount 26mm back from front edge of drawer.
Tack weld each end of bracket and use slots in bracket as weld indicators for centre weld tacks.

MIG weld mount to drawer body wrapping end welds 10mm around back side of mount. Use TIG torch to blend end welds around mount.
Square up mount with mallet if needed.
Clean welds with rag and wire brush.
Use Orbital Sander to tidy up any lumpy stop starts in welds on drawer mounts.

Check fronts of drawer inner haven't bowed. Should be 90 degrees, adjust with mallet if needed.

Using straight edge check drawer isn't bowed on inner drawer stiffeners and camera mount. Tap with mallet to flatten if needed.
Open and close drawer to make sure everything works smoothly.

Clean drawer inside and out with 3M Stainless Steel Cleaner and Polish.