
Knowby
Smart shed
How to assemble a single door smart shed
1
Step 1 of 59

Layout base frame section A and B ensuring that the diagonal braces are on the outside of the frame.

2
Step 2 of 59

Join section A and B together using 12 fasteners, two fasteners per section.

3
Step 3 of 59

Fasten the two 150 x 50 x 2mm RHS forklift slippers to the base using four saddles per side.

4
Step 4 of 59

Using a tape measure square up the frame.

5
Step 5 of 59
<p>Layout the 7 of 64mm top hats evenly across the frame and screw off. Using two screws per floor joist.(14 screws per top hat)</p>

Layout the 7 of 64mm top hats evenly across the frame and screw off. Using two screws per floor joist.(14 screws per top hat)

6
Step 6 of 59
<p>Flip frame 180 degree and insure the frame is still square.</p>

Flip frame 180 degree and insure the frame is still square.

7
Step 7 of 59
<p>Fit first sheet of ply ensuring that there is 150 mm around each edge of the ply.</p>

Fit first sheet of ply ensuring that there is 150 mm around each edge of the ply.

8
Step 8 of 59
<p>Screw off each sheet of ply on every floor joist, using five screws per joist. ( 35 screws per sheet of ply) Repeat the process along the shed until the last piece of ply.</p>

Screw off each sheet of ply on every floor joist, using five screws per joist. ( 35 screws per sheet of ply) Repeat the process along the shed until the last piece of ply.

9
Step 9 of 59
<p>For the last sheet of ply measure from the edge of the ply to the last point of the flooring which is 150 mm from the end of the frame. Cut and slit board to size. Fit and screw off.</p>

For the last sheet of ply measure from the edge of the ply to the last point of the flooring which is 150 mm from the end of the frame. Cut and slit board to size. Fit and screw off.

10
Step 10 of 59
<p>Secure the four long end flashings and screw in the sides with tec screws ( 2 screws per flashing)</p>

Secure the four long end flashings and screw in the sides with tec screws ( 2 screws per flashing)

11
Step 11 of 59
<p>Secure in the short and flashings using a tech screws. (2 screws per flashing)</p>

Secure in the short and flashings using a tech screws. (2 screws per flashing)

12
Step 12 of 59
<p>Starting with your right hand front corner line your first wall up with the edge of the flooring.</p>

Starting with your right hand front corner line your first wall up with the edge of the flooring.

13
Step 13 of 59

Using tech screws, screw the wall to the floor using two tech screws per bay to fix to the floor.

14
Step 14 of 59
<p>Using the holes provided screw in the shortest mullion to the side wall fixing it every hole provided plus adding two screws to the floor this will support your wall, insure the double wall Joyce is facing the inside where the roller door will be.</p>

Using the holes provided screw in the shortest mullion to the side wall fixing it every hole provided plus adding two screws to the floor this will support your wall, insure the double wall Joyce is facing the inside where the roller door will be.

15
Step 15 of 59
<p>Peel double sided tape on flange of wall.</p>

Peel double sided tape on flange of wall.

16
Step 16 of 59
<p>Fit the the second wall into position, screw both wall frames together using two tech screws per bay.</p>

Fit the the second wall into position, screw both wall frames together using two tech screws per bay.

17
Step 17 of 59
<p>Screw the second wall frame off to the floor using two tech screws per bay.</p>

Screw the second wall frame off to the floor using two tech screws per bay.

18
Step 18 of 59
<p>Fit the third wall rear wall to the back of the shed screw off the second wall to the third wall using two tech screws per bay.</p>

Fit the third wall rear wall to the back of the shed screw off the second wall to the third wall using two tech screws per bay.

19
Step 19 of 59
<p>Screw off the third wall frame to the floor using two screws per bay.</p>

Screw off the third wall frame to the floor using two screws per bay.

20
Step 20 of 59
<p>Install the fourth wall and screw off using two tech screws per bay.</p>

Install the fourth wall and screw off using two tech screws per bay.

21
Step 21 of 59
<p>Screw off wall for using two tech screws per bay.</p>

Screw off wall for using two tech screws per bay.

22
Step 22 of 59
<p>Lineup wall five with wall four and screw off using two tech screws per segment.</p>

Lineup wall five with wall four and screw off using two tech screws per segment.

23
Step 23 of 59
<p>Screw wall 5 to the floor using two text screws per segment.</p>

Screw wall 5 to the floor using two text screws per segment.

24
Step 24 of 59
<p>Fit the left-hand side mine screwing it off to wall five using two tech screws per segment and two tech screws on the bottom floor of the minion.</p>

Fit the left-hand side mine screwing it off to wall five using two tech screws per segment and two tech screws on the bottom floor of the minion.

25
Step 25 of 59
<p>Fit header and screw off to margin on left and right size using one tech screw per position showing in photo.</p>

Fit header and screw off to margin on left and right size using one tech screw per position showing in photo.

26
Step 26 of 59
<p>Screw the header off to the man in position shown in photo using two tech screws on the left-hand side of the header and the right-hand side of the header.</p>

Screw the header off to the man in position shown in photo using two tech screws on the left-hand side of the header and the right-hand side of the header.

27
Step 27 of 59
<p>Measure 1200 from the back of the shed to the centre of the bracket and fit bracket to both sides of the shed. Cut and install top hat to the bracket.</p>

Measure 1200 from the back of the shed to the centre of the bracket and fit bracket to both sides of the shed. Cut and install top hat to the bracket.

28
Step 28 of 59
<p>Measure 2400 to the centre of the bracket and install bracket and attached top hat.</p>

Measure 2400 to the centre of the bracket and install bracket and attached top hat.

29
Step 29 of 59
<p>Measure 3600 from the back of the shed to the centre of the bracket install bracket and attached top hat.</p>

Measure 3600 from the back of the shed to the centre of the bracket install bracket and attached top hat.

30
Step 30 of 59
<p>Measure 4800 from the back of the shed to the centre of the bracket install bracket and attached top hat.</p>

Measure 4800 from the back of the shed to the centre of the bracket install bracket and attached top hat.

31
Step 31 of 59
<p>Install socking on roof and tape down.</p>

Install socking on roof and tape down.

32
Step 32 of 59
<p>Lay roof sheets out onto roof overlapping at the join line the sheets up with the front of the main header.</p>

Lay roof sheets out onto roof overlapping at the join line the sheets up with the front of the main header.

33
Step 33 of 59
<p>Fit left and right mullion and put into place.</p>

Fit left and right mullion and put into place.

34
Step 34 of 59

Fit the header and put into place.

35
Step 35 of 59
<p>Make sure everything is lined up on the roof.</p>

Make sure everything is lined up on the roof.

36
Step 36 of 59
<p>Make sure everything is lined up.</p>

Make sure everything is lined up.

37
Step 37 of 59
<p>Screw roof down on the front, back and middle.</p>

Screw roof down on the front, back and middle.

38
Step 38 of 59
<p>Fit and place left and right flashings.</p>

Fit and place left and right flashings.

39
Step 39 of 59
<p>Fit and place corner flashings.</p>

Fit and place corner flashings.

40
Step 40 of 59
<p>Make sure everything is lined up then screw flashings to the roof on left and right side.</p>

Make sure everything is lined up then screw flashings to the roof on left and right side.

41
Step 41 of 59
<p>Drill and pop rivot mullions, header,  flashings and corner flashings around entire shed.</p>

Drill and pop rivot mullions, header, flashings and corner flashings around entire shed.

42
Step 42 of 59
<p>Drill and pop rivit end stops to gutter.</p>

Drill and pop rivit end stops to gutter.

43
Step 43 of 59
<p>Create an opening in the bottom of your gutter so you can insert the gutter holder.</p>

Create an opening in the bottom of your gutter so you can insert the gutter holder.

44
Step 44 of 59
<p>Insert the gutter holder.</p>

Insert the gutter holder.

45
Step 45 of 59
<p>Screw in 4 brackets along the back.</p>

Screw in 4 brackets along the back.

46
Step 46 of 59
<p>Attach gutter to the back of the shed.</p>

Attach gutter to the back of the shed.

47
Step 47 of 59
<p>Attach down pipe to the gutter and drill and pop rivit the sides to stop it from slipping.</p>

Attach down pipe to the gutter and drill and pop rivit the sides to stop it from slipping.

48
Step 48 of 59
<p>Attach down pipe brack to the back of the shed and around the down by drilling holes and pop rivitong and pop rivit the sides to stop it from slipping.</p>

Attach down pipe brack to the back of the shed and around the down by drilling holes and pop rivitong and pop rivit the sides to stop it from slipping.

49
Step 49 of 59

Screw in roller door track on both sides.

50
Step 50 of 59

Screw in brackets on both sides.

51
Step 51 of 59
<p>Hang the roller door.</p>

Hang the roller door.

52
Step 52 of 59
<p>Use U brackets to hold door in place.</p>

Use U brackets to hold door in place.

53
Step 53 of 59
<p>Unwrap roller door carefully.</p>

Unwrap roller door carefully.

54
Step 54 of 59
<p>Carefully put the bottom of the roller door in the roller door track.</p>

Carefully put the bottom of the roller door in the roller door track.

55
Step 55 of 59
<p>Screw in stopper brackets.</p>

Screw in stopper brackets.

56
Step 56 of 59
<p>Add your door handle.</p>

Add your door handle.

57
Step 57 of 59
<p>Drill a hole for your lock.</p>

Drill a hole for your lock.

58
Step 58 of 59
<p>Install your lock.</p>

Install your lock.

59
Step 59 of 59
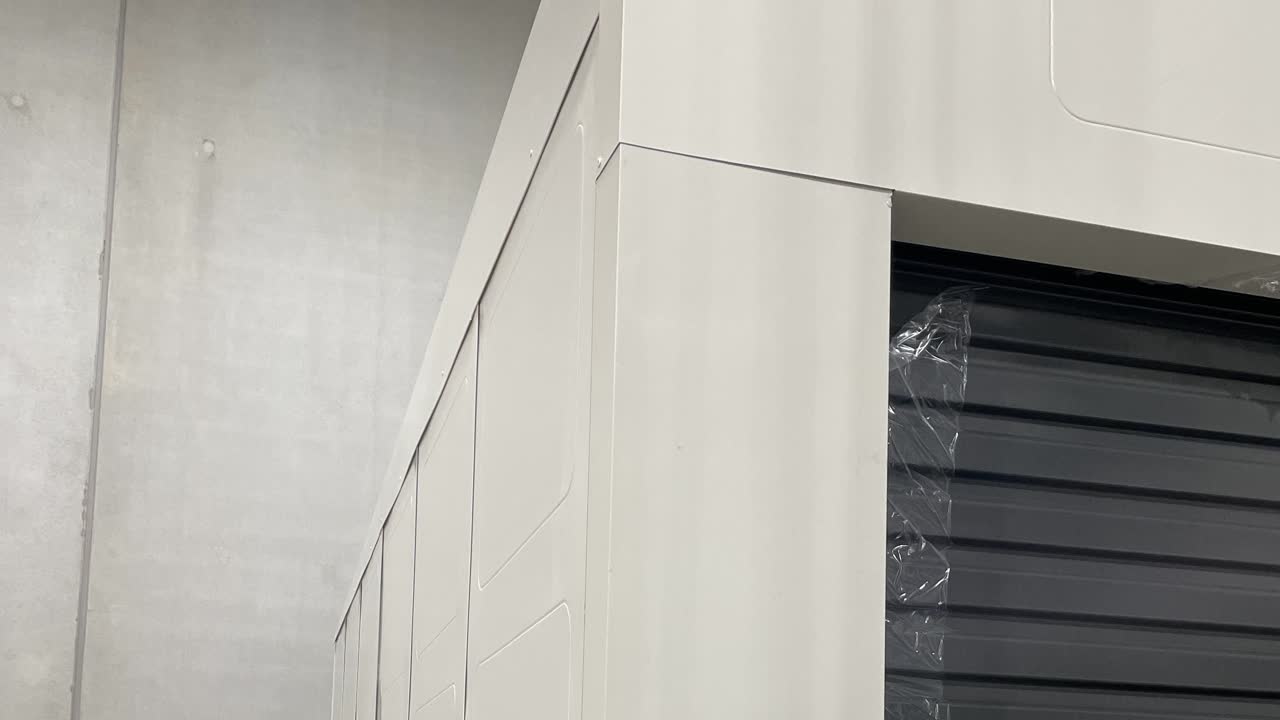
<p>Make sure to peel all the plastic off and then your smart shed is complete.</p>

Make sure to peel all the plastic off and then your smart shed is complete.